


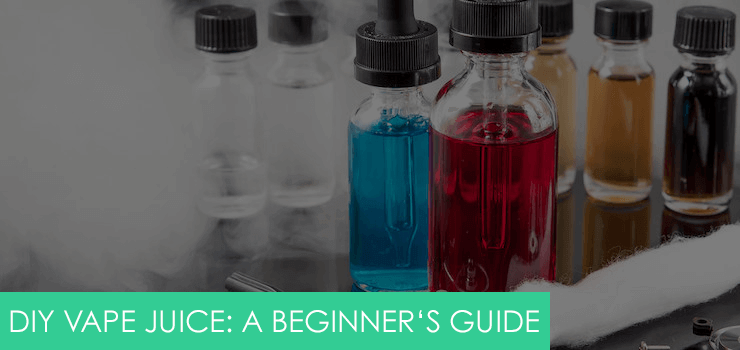
If you’ve been vaping for some time, you might be getting fed up with spending a lot of money on pre-made e-liquid to full up your vape mod or vape pen.
Perhaps you’ve got some exciting ideas for a new and unusual flavour? The answer could be to start making your very own e-juices.
It can be a lot of fun to mix your own e-liquids, and it isn’t as hard as it might sound as long as you know the basics.
This helpful guide will help you to enjoy a more customised vaping experience that’s perfectly suited to you.
Necessary Ingredients for Making e-liquid

There are a few standard ingredients that you’re going to need to have to hand in order to start making your own e-juice.
Nicotine – you’ll need a dilute nicotine liquid which comes in a range of strengths. It may take a little experimentation to find the right strength to suit you.
For example, if you only want a very small amount of nicotine (ideal for someone who was only a casual smoker) you will probably be satisfied with an 8mg nicotine level.
However, if you are a heavy smoker and need a stronger hit, a 24mg nicotine level will be best for you.
It’s important to take care when you’re handling nicotine as you could end up overdosing.
Bear in mind that nicotine actually has its own flavour and this can make a recipe taste different if you use a higher strength.
PG or VG – you will need some VG (vegetable glycerine) or PG (propylene glycol) to dilute your e-liquid.
Since both flavours and nicotine are very concentrated, they require dilution to make your vaping experience a pleasurable one.
VG or PG will be the carrier fluid or base that makes up the majority of your e-juice formula.
VG and PG have different viscosities, tastes and a different throat feel when you vape them.
Usually, e-liquids have a blend of both in a specific ratio. The most common ratios are 50:50 or 70:30 although some experimentation is usually best when starting out.
PG is a chemical compound which is commonly found in tobacco, personal care products and food as well as pharmaceutical products.
PG is known for its strong throat hit, and it is also known to cause allergic reactions in some vapers.
VG, on the other hand, is thicker and sweeter than PG. If you have a higher ratio of VG to PG, wicking will take longer, and the flavour may be altered.
High VG e-liquids are popular with drippers due to its smooth throat feel and the huge clouds they can create.
Flavour – there are lots of flavours to choose from. However, if you use flavours that are designed to be inhaled rather than opting for food flavourings, you’ll get a better tasting e-juice as a result.
It’s essential to pay close attention to the label on the flavour before using it since some require different amounts to be added.
Water (optional) – although water isn’t a crucial ingredient when making your own e-liquid, it can thin out a 100% VG mix.
Necessary Equipment
There are a number of essential pieces of equipment which you’ll also need to hand when you’re ready to start producing your own e-liquid.
These include:
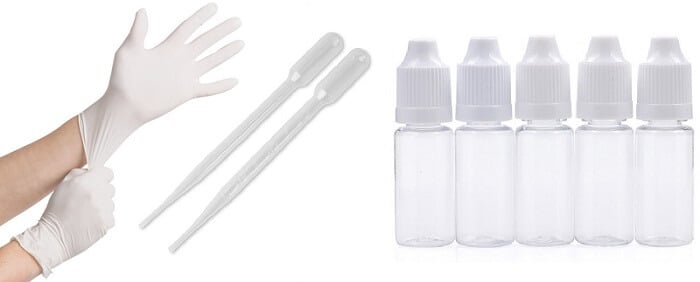
Storage bottles – you’ll need to store the base liquid in a squeeze bottle with a nozzle tip as this will make it much easier to add into your homemade e-juice.
100ml condiment bottles are ideal for this. When it comes to storing nicotine, you should use cobalt or amber bottles since the solid glass, and dark colour will slow down the degradation process.
E-Liquid bottles – while experimenting with making your own e-juice buy some 10ml plastic bottles which are perfect for testing recipes as well as some larger 60ml capacity bottles which can be used to make larger amounts of the e-liquids that you’re most happy with.
Labels – get some sticky labels so you can easily add details to every bottle of e-liquid you make. Then you’ll know when the e-juice was made, which flavour it is and the ratio of VG and PG you used.
Gloves – you should always make sure to have disposable gloves to hand when making your own e-liquid. Nicotine is easily absorbed through your skin, so you need to protect yourself just in case of an accidental spillage.
Syringes – when making your own e-juice you’ll require some syringes in different sizes. 10-30ml syringes are best for base liquid while 1ml syringes are the best choice for your flavour concentrates and nicotine.
You will also require needles to deal with your PG or VG. When you use a syringe, you’ll be sure to get the precise amount of ingredients into your e-juice.
Once you know just how much you’ve used, you can the replicate your recipe perfectly time and again.
How to make your e-juice step-by-step

Step 1 – Prepare Nicotine
The first thing to do before making your first e-juice is to work out the nicotine strength you need to use.
Once you know how strong you want it to be, you’ll need to work out the amount of nicotine necessary.
You can do this by determining the number of milligrams of nicotine you’ll need. The formula for this is:
(strength in mg/ml)(volume in ml)=nicotine amount in milligrams.
Next, you’ll need to work out the volume that you’ll need to use. The formula for this is:
(amount needed)/(Strength of dilute nicotine)=volume needed
Step 2 – Transfer Nicotine to Bottle
Now you’re ready to transfer your nicotine into the bottle. Using a clean syringe, you’ll need to extract the right amount from your nicotine container.
It’s quite tricky to get the precise amount in your syringe, so make sure to take just a little bit more nicotine than you need then push the plunger back down to the right mark.
Keep your syringe pointing into the nicotine as you depress the plunger so no dilute nicotine will be wasted.
It’s important to be aware that any air bubbles inside the syringe could make your measurements inaccurate.
If you see air inside the syringe, hold the needle pointing upwards and tap on the syringe as this will bring any air up to the top.
Once you’ve, don’t this, press down the plunger until you see liquid appearing at the needle tip.
At this point, you can point the needle downwards again into the container then push down the plunger to get the correct measurement.
Once you have the right amount in your syringe, simply add it to the bottle.
Step 3 – Prepare Flavour
The next step is to add some flavour. It’s usually recommended to have a 10% dilution for e-flavours.
You’ll also need a clean syringe with which to measure then transfer the flavour concentrate into the bottle.
You’ll do this in exactly the same way as you did with the nicotine. Bear in mind that flavour concentrates are complicated and adding more flavour into your e-liquid may actually worsen the taste.
This is why using no more flavour than 15% of the e-liquid’s total volume is the best idea. If you use a different flavour concentrate, you’ll need a dilution level of around 20%-30%.
If you’re planning on mixing several flavours, you may be surprised by the final result. Experimentation is the only way to determine which flavours you like best.
Often, trying a flavour on its own with only a PG:VG base is the best starting point to determine the flavour’s nuances before adding it into a recipe.
Step 4 – Prepare Base
Next, you have to add the base to make your liquid complete. This will either be PG, VG or a mix of both.
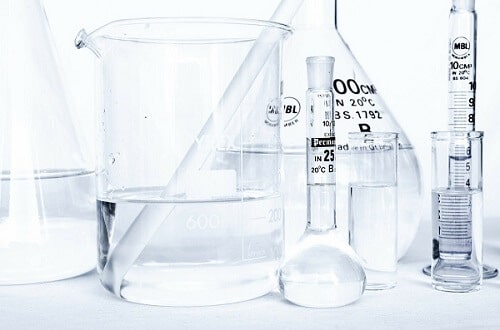
You will need to make sure that you’ve calculated the precise amount of base to add and this is why using an e-juice calculator is the best solution.
Step 5 – Mix the blend
Now you have all your ingredients in the bottle, so it’s time to put on the drip tip and shake the bottle vigorously for a few minutes.
This will ensure the flavour and nicotine have been dispersed evenly.
Step 6 – Steep Your E-Liquid
The final step is to steep your e-liquid. You may want to start vaping your new recipe immediately, however, all too often, you’ll discover the flavour isn’t quite what you expected if you vape it straight away.
Just like a fine wine, when e-liquids are allowed to steep for a while, the flavours can properly develop, and the result is a better taste.
When you steep your e-liquid, chemical reactions will take place between oxygen in the air, and the ingredients it contains and the flavours will blend properly.
After shaking your e-liquid, leave the cap off and allow the formula to breathe for several days before vaping it.
This is especially important when using custard, vanilla or creamy flavours since time improves these sweet tastes.
Vape Juice Calculator

Whichever method you use to make your e-liquid, you’ll probably benefit from using an online e-juice calculator at some point.
This simplifies the process of making your own e-juice.
You’ll be able to quickly work out how much nicotine you’ll need to get the right strength and also how much of each ingredient you’ll need to produce an e-juice with your chosen PG:VG ratio.
Most e-juice calculators are on the web. However, some can be downloaded for your desktop or mobile.
They’re quite simple to use since you just enter your preferred level of nicotine, the flavour percentage and ratio and the ingredient quantities will immediately appear.
Tips and Tricks of DIY ejuices
There are a few tips and tricks you can put into practice to help you achieve even better results:
- Use online resources and tools to help you to get the results you’re looking for.
Don’t go overboard with your flavours. A larger amount won’t necessarily make your vape more flavourful and may actually spoil the taste of your e-juice. - Don’t use a different brand of concentrate if you’re following an existing e-juice recipe. This is because even when flavours have the same names, they may have very different profiles in practice.
- Take care with your concentrates’ potency which will vary between brands and even within different flavours from the same brand. Make sure to check the percentage that will be required when mixing on the label of each flavour.
- Make lots of notes after you’ve tested your e-juices. Note down whether you think the e-liquid you’ve produced is too strong or weak, whether the flavour is satisfying or whether it could benefit with a sweeter hint or a fruitier note. The more detailed your notes, the more effective your experimentation will be.
- Testing single flavours is the best way to determine how your concentrate will affect your mix. Vape each one on its own first so you have a good idea of your starting point.
Verdict
Although learning to make your own vape juice is a time-consuming process, it’s a lot of fun.
You will need to experiment and frequently test to learn how to make a perfect mix for you, but once you’ve found your ideal flavour, you’ll be able to replicate it easily.
As an added bonus, making your own e-liquids saves you a lot of money in the long run compared with buying pre-made e-juices time and again.
Of course, not every experiment will be successful, and it can become tiring and tedious if you keep on producing unpleasant-tasting recipes.
Not every vaper is cut out for making their own e-liquids, and if you’re not having any success, it might be best for you to simply go back to buying pre-made juices with flavours you truly enjoy.
PLEASE NOTE: If you follow this guide, the risk is entirely yours. We cannot hold responsibility for any damage or injury caused by using or misusing the information that you have read here.
Also, remember that your own mixed e-juices are only for you to consume yourself. You cannot sell your homemade e-juices as this is against the law.