


As a vaper, some of the most common tasks that you will have to carry out are refilling your tank and cleaning it out.
Luckily, these are simple tasks to accomplish, whatever kind of clearomiser or tank you have.
Although there are one or two small differences between devices, the principles remain the same.
Here is your guide to filling, refilling and cleaning your vape.
What is a Clearomiser?
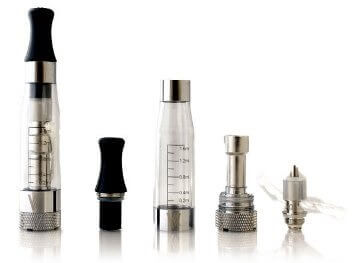
Before we launch into describing how to clean and fill a clearomiser, it is important to know what exactly is being discussed.
The term clearomiser is a blend of two words – clear and cartomiser, describing the clear nature of the tank. However, early clearomisers were not actually clear but instead were made from metal.
A clearomiser’s defining trait is its lack of filler material when compared to a traditional cartomiser which contains an absorbent filler material which is designed to hold the e-juice.
A clearomiser has no such filler, instead relying upon a reservoir to hold the e liquid which is then directly transferred to the wick which runs through the heating coils.
All modern clearomisers are based around this concept; however, between models, the execution can vary greatly.
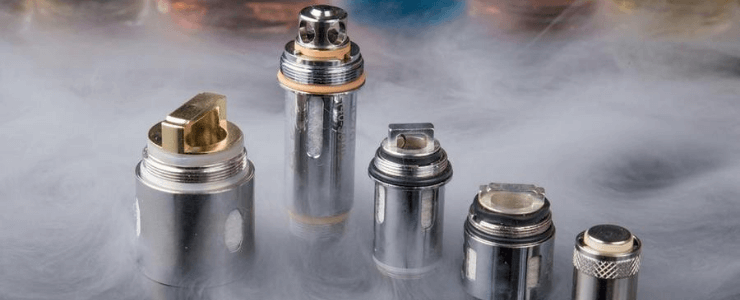
Clearomiser Types
There are three main types of clearomiser, each with its own specific design.
Bottom Coil Clearomisers
This modern design of clearomiser features a coil inside the bottom of the tank instead of at the top.
This means that less wick is necessary since gravity feeds the coil and this allows the e-liquid to reach the coil more evenly and more quickly, helping in avoiding any dry burns and helping to prolong the clearomiser’s lifespan.
Instead of having a removable top and fixed bottom assembly, many bottom coil clearomisers have a fixed top and a bottom which unscrews to allow the user to replace the coil and to refill the tank.
There are several shapes and sizes of bottom coil clearomisers, and the majority allow for coils to be replaced by simply unscrewing the base.
Vertical Coil Clearomisers
In a traditional clearomiser design, the heating coil sits across the airflow, and this may result in airflow resistance which can cause the coil to heat unevenly.
In a vertical coil clearomiser, the coil sits vertically to the airflow, and this reduces airflow resistance, improving vapour production and making vaping more pleasurable.
Sub-Ohm Clearomiser
This type of clearomiser uses a coil that has a resistance under 1 ohm and has an airflow that is much more open, allowing for a considerable amount of vapour to be produced.
One thing to note about sub-ohm clearomisers, however, is that they require more power and therefore drain their battery more quickly.
A sub-ohm tank is usually unscrewed at the base to access the coil. However, this can usually be accomplished without the need to empty the tank.
The majority of sub-ohm clearomisers are filled from the bottom; however, some modern devices now feature top filling designs.
How to Fill a Clearomiser?
In order to refill a clearomiser, there are three essential pieces of equipment that you will need:
- A Clearomiser
- A bottle of ejuice
- A needle tip bottle cap
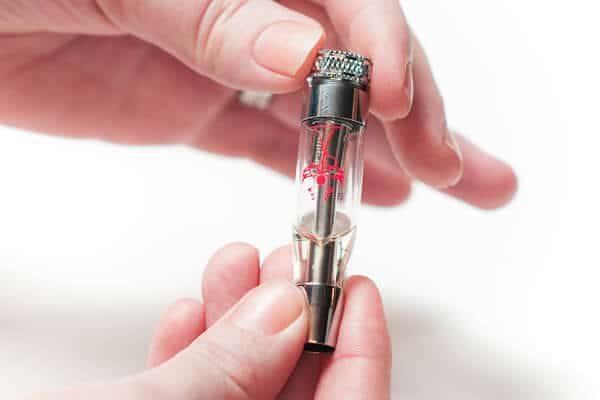
To refill your clearomizer, you should begin by removing the mouthpiece or top white rubber cap and then use the needle tip cap to remove the clear ring seal.
When doing this, you should take care to avoid hitting the heating coil by accident. Put the needle cap onto the e-liquid bottle.
This can be achieved by unscrewing the bottle’s cap, pressing it to the side and then when it comes off, screwing the needle cap into its place.
There are two small holes below the ring seal, and these are the holes that the clearomiser is filled through.
Put the needle tip into one hole and then the other to ensure that they are both open. Now fill up the tube. If the e-liquid begins to come out of the other hole, the tube is full.
Remove the needle cap and add a couple of drops of e-juice onto the wick and coil in order to prime it.
You can decide whether or not to replace the clear ring seal, and however, if you choose not to put it back on, you run the risk of leakage.
Put the rubber end cap back onto the top of the tube and then put the clearomiser threads into a paper towel and blow out any e-liquid from the air shaft.
Wipe the threads to ensure they are dry and clean before screwing the clearomiser back onto the battery.
There is one key rule when refilling any type of clearomiser and that is to to take care not to pour any e-juice into the centre tube by accident as this will flood the heating coil and make a mess.
Using a fine tipped e-liquid bottle is one of the best ways to dispense the e-juice precisely, and by tilting the clearomiser, you can let the e-juice run down into the tank freely.
If your clearomiser has any markings, make sure not to fill to above the top marker level as this will ensure that the e-juice will not overtop the centre tube when you reassemble your clearomiser.
When you fill a new clearomizer and use it for the first time, you may experience a burnt taste. You can avoid this by leaving the clearomiser to stand for a few minutes or by swilling the e-liquid around to ensure it is fully absorbed by the wick before you use it.
If you accidentally overfill your clearomiser, you may discover e-liquid leaking out or hear a gurgling sound during use.
You can rectify this problem by removing the clearomiser from the battery and placing a paper cloth over the battery connector. By blowing strongly through the mouthpiece a few times, you will be able to clear away any excess liquid.
A bottom coil clearomiser must always be filled from the bottom, and you should never remove the top as this makes a mess.
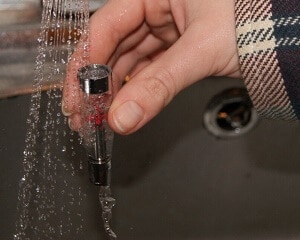
How to Clean It?
 Like most e-cig components, a clearomizer has a finite lifespan. As buildup begins to accumulate on the heating coil, the plastic begins to crack, and parts start to wear down, you will find that replacing the clearomiser becomes necessary.
However, if you perform regular maintenance, you will find that your products will enjoy a longer lifespan.
Some modern vertical coils can be tricky to clean without causing them damage; however, most coils can still be improved if they are cleaned carefully.
It is easy to clean a vape tank. Simply rinsing it is usually enough to minimise buildup, so take apart all of your clearomiser’s components and put them under running hot water to remove the buildup.
If your heating coil is very gummed up, you can soak the heads in a strong, clear liquor or pure grain alcohol which will break up the deposits before you rinse them through. However, you should never use rubbing alcohol for this purpose.