


Building your very own coil for your vape can be a great way to save money.
Rather than buying cheap and flimsy disposable coil heads on a regular basis you can just make your own for a fraction of the overall price.
Making your very own coils can also be a new hobby, a hobby that many vape users share and enjoy immensely.
While it may seem a little intimidating at first, you can be assured that with enough practice and repetition, you will get better and better at making your very own coils.
This article aims to provide you with some much-needed tips and tricks that intend to make your coil-building life much easier.
Supplies to Build a Vape Coil
Building a vape coil may seem like a very daunting project at first, but there are several ways that you can keep this process simple and easy.
The first of which is to narrow down exactly what you need and want in your vape coil.
The market may be flooded with thousands of different types and kinds of vaping accessories, tools and parts, but you should just focus on the essentials first.
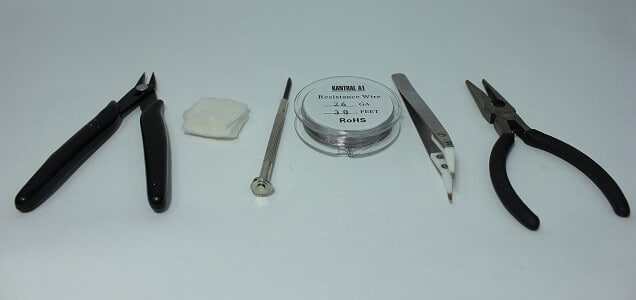
You should pay close attention to the following items:
- resistance wire
- flush cutters
- ceramic tweezers
- a small metal rod (such as a screwdriver)
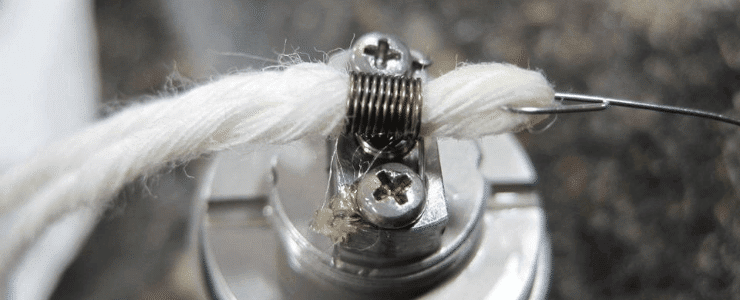
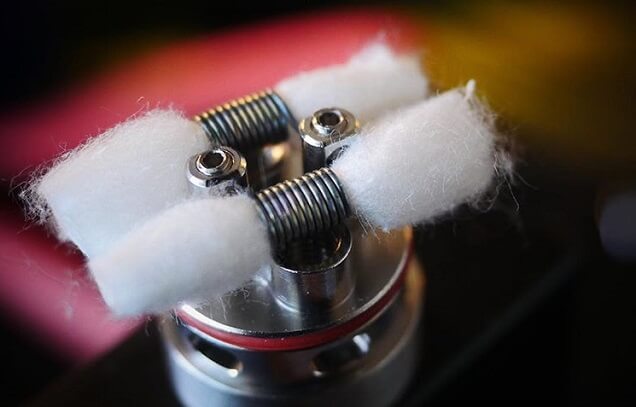
- organic cotton and scissors
These are the most vital components to any vape kit.
Macro and Micro
There are two primary coil builds, micro and macro coils. These coils are both created by wrapping a single piece of wire around a screwdriver or coil jig.
The only difference between the two types of coil is the inner diameter.
A micro coil has an inner diameter of 1-2mm, while a macro coil has an inner diameter that is larger than 2mm.
How to Use a Coil Jig
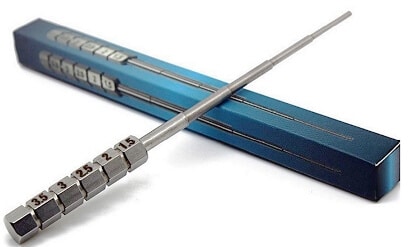
A coil jig is a tool used to guide the wrapping of coils around the rod. The process of using a coil jig should be a relatively straightforward one.
Simply take the coil jig with the diameter corresponding with the diameter of coil you wish to make, slot the rod into the holes in the jig and gradually rotate the jig. The coil will be ready in no time.
How to Build a Coil for an RDA
A relatively straightforward process, building a coil for an RDA vape should only take a few key steps.
The first step should be checking the vape deck for a single-coil or dual-coil atomizer. Make sure of the deck’s size, and it will likely allow for a 3mm coil.
Once you have established the correct size and number of coils required, check the position of the posts within the deck as some decks often need the leads of the coil to be aimed in the same direction.
When the coils have been wrapped and are in place, you must then place the coil leads in the post holes and screw them in.
How to Build a Coil for an RBA or an RTA
Both RBA and RTA sub-ohm tanks have their own particular restrictions.
The most common of these limitations is the lack of space within the deck. This means that large coils tend not to fit into these tanks.
The coil cannot touch the chimney of the vape if your chosen coil does then a smaller diameter build must be used.
Simply use the same method for these coils as with the RDA coils, securing them in place with screws once they have been sized and wrapped.
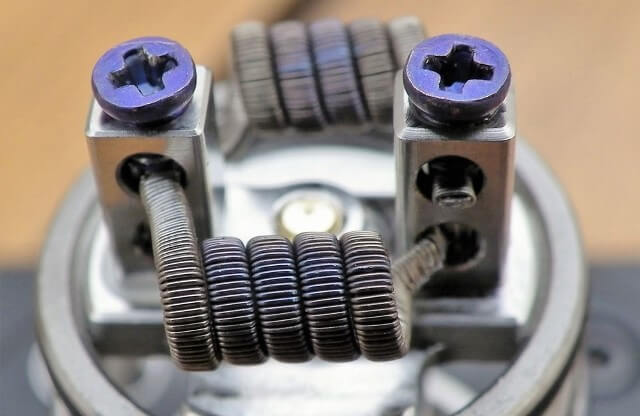
A Twisted Build
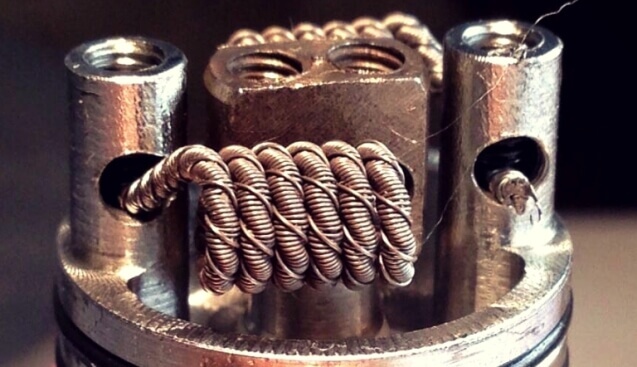
A more complex coil often has a twisted build. A twisted build is when you twist two separate strands of wire together to form one piece of twisted wire.
This can be done by hand or with a drill. A twisted build is often used to increase the surface area of the coil without dramatically decreasing the coil’s resistance.
This tends to have a large, positive impact of the flavour of the vape overall.
How to Build a Parallel Coil
A parallel coil is a multi-strand wire that, fortunately, does not require the use of any tools in order to place it within the vape.
Essentially, a parallel coil is manufactured by wrapping two, or more, wires around each other.
To build a parallel coil simply use the same standard steps from when building an RDA coil via the use of a coil jig for the first coil.
Then wrap a second coil manually within the gaps of the first, thus creating a parallel coil system.
A Single or Double Coil Build?
You may be aware that many different coil builds have two coils as opposed to just one.
A two-coil build is often known as a dual coil build. Having a dual coil build naturally increases the amount of vapour within the coil.
If you should opt for a dual coil build, then make sure that both coils are made with an identical form and size.
This needs to be the case so that they each heat up effectively.
Some Additional Help
When trying to create your own coil for the first time, or even the second or third time, it is highly recommended that you seek out the help of a tutorial video.
These free videos on YouTube often show a hands-on demonstration of how to make the coil and often clearly show the process from several different angles.
The creator of the video will also usually narrate over what they are doing, making sure that each step of the process is thoroughly discussed and explained.
These videos are a great way to begin your coil-making hobby.
Practice Makes Perfect
Coil building can be a very, very difficult hobby. It will take a long time to figure out exactly what to do and how to do it effectively.
You will go wrong, a lot, but you should never be disheartened. Simply keep practising, and with enough time and effort, you will begin to see an improvement.
Soon you’ll be making coils within a matter of moments. No longer will you need to fork out for hundreds of flimsy disposable coils per month.
Once you’ve practised a little and have your technique nailed down, you can fully embrace the culture that surrounds the world of coil-building and discover the many talented people out there that consider coil-building as an art form and not just a hobby.
Read more about Best Vape Tanks available in the United Kingdom on this article >